Why a T1 Line:
The first and foremost reason a person would choose a T1 for their business internet connection is reliability. T1 lines have a very good uptime, which means they are operational 24/7/365. If you were to have an issue, the service has a high priority to repair. This means that within 4 hrs, the telecom needs to address the issue and figure out what is wrong. They dont guarantee to fix it, but they guarantee to tell you what is wrong within 4 hrs. In most cases they do try their best to fix it as soon as possible. If you have a problem with your DSL line for example, they may not address the issue for a few days. DSL lines have a low priority repair with the telecom companies. So you really dont want to have you business be dependent on a DSL, if you really require service 24/7. You want to know why? Its because DSL lines are so cheap. You get what you pay for when it comes to internet connection service.
Can your business afford to be without internet for a few days?
Physical Layer:
The physical layer is the wiring part of a T1 line. In most cases the telecom will bring a RJ-45 jack and mount it in your server room. When you order the line you tell them where you want it to terminate.
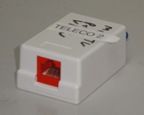
There are 2 kinds of RJ-45 jacks that may be installed. One is a standard RJ-45 jack, which is open when a cable is not connected. And the other automatically loop backs when a cable is not installed. This helps with testing the T1 line during initial installation or troubleshooting if the line is down. If you have a standard jack, you can create your own loop back device for testing the T1 line.
Click to view the T1 loop back device
Equipment: Easiest, Internal DSU/CSU
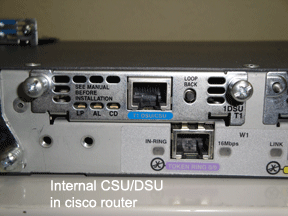
The easiest way to setup a T1 line for your company is to use a cisco router with an internal CSU/DSU, an example of what it looks like is show on the right. The CSU/DSU is basically like a modem that communicates with the other side in T1 language. Using a cisco router with an internal CSU/DSU just make things a little cleaner in your server room. You can use something like a cisco 1600, 1700, 1800 or 2600 router. They all allow the internal CSU/DSU card to be installed. Click here to see what the Cisco T1 DSU/CSU WAN Interface Card looks like outside of the router. The model number for the card alone is WIC-1DSU-T1-V2. You can find both the router and the card on ebay.com. With this setup you only need to connect an ethernet cable from the RJ-45 jack supplied by the telecom to the Internal DSU/CSU.
Equipment: Newer Style Serial Port, External CSU/DSU
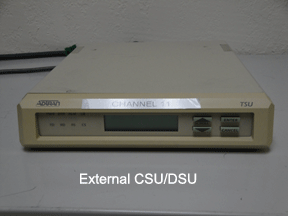
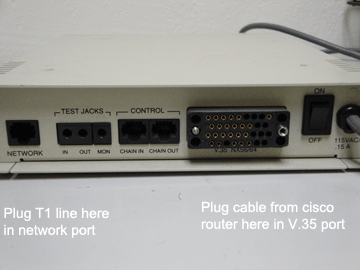
This is an example of some of the equipment that can be used for business T1 line, that doesnt have an internal DSU/CSU card. With this type of setup you will use and external DSU/CSU, like the one shown to the right. When you use an external DSU/CSU you will need to connect 2 items to it. One is the cable(cat5) from the RJ-45, and the other is a V.35 cable that will connect to the cisco router, shown below left. 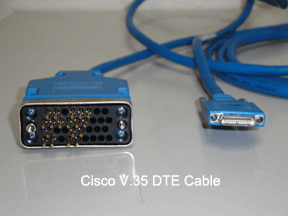 This cable has the newer style serial port ends. Its much smaller than the older style, shown in the next section. This setup works well when you dont have any space requirements or limitations. You can find both the router and external CSU/DSU on ebay.com.
Equipment: Older Style Serial Port, External CSU/DSU
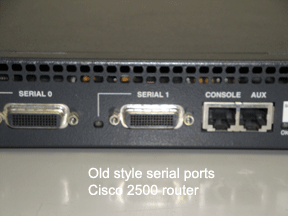

This is an example of some of the older style equipment that can be used for business T1 line. The first piece of equipment you will need is a cisco 2500 router. Its a few years old, but should still work fine for a single T1 line. Cisco 2500 routers are no longer being made, but can be found in many surplus stores, or on ebay.com.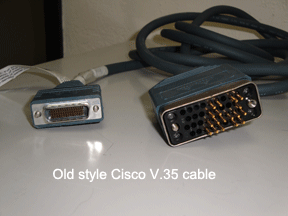 You still need the external DSU/CSU to make the line work. The picture to the left shows the older style V.35 cable. Notice that the serial port is a little larger when compared to the newer style. You can find both the router and external CSU/DSU on ebay.com.
Router Configuration:
Once you have the cable plugged in from the RJ-45 jack(supplied by the telecom) to your cisco router you are ready to configure the router.
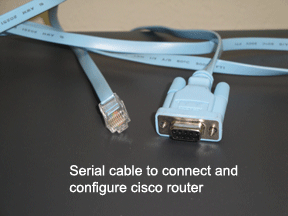
You will need to connect to the router using a cable like the one shown to the right. It connects to the serial port of your pc, and the other end connect to console port on the cisco router.
This ia an example config for cisco 1600,1700,1800 and 2600 routers, with an internal DSU/CSU
Once you are logged in you can type the following:
config t
#if you have external DSU/CSU you wont need this part controller t1 0/1
channel-group 1 timeslots 1-24
#end internal DSU/CSU interface serial 0/0/0:1 <===This is you outside interface
no shut
description point to point to internet provider
encap ppp
ip address 192.168.1.1 255.255.255.252
interface Fast 0/0 <===This is you inside interface
ip address 10.20.20.1 255.255.255.0
ip route 0.0.0.0 0.0.0.0 192.168.1.2 <===This is your gateway to your internet provider

 Stumble Upon
 Del.icio.us
 Buzz
Buzz