Feb 27

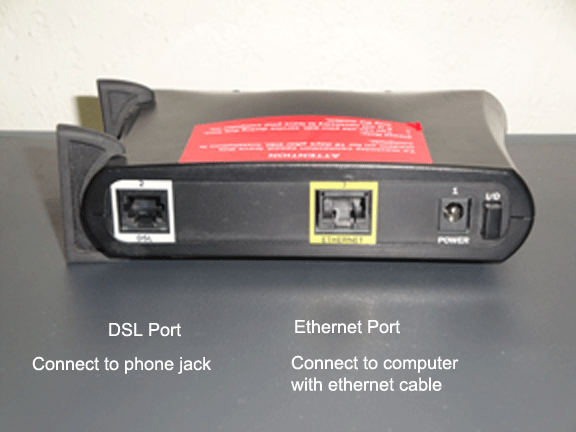
Sometimes we are called by clients that report slow speeds on their Internet service. When we check the Internet service and find no errors most commonly the problem is usually an Ethernet problem cause by an Ethernet speed mismatch or an Ethernet duplex mismatch.

Most Ethernet switch ports are usually set to auto negotiation in the switch port configuration. Auto negotiation attempts to choose a speed and duplex for the Ethernet link between the two ports. For auto negotiation to work it must be set on both switch ports that are attempting to communicate with each other. It can not be set on just one side. Sometimes even thought you have auto negotiation set on both sides of a link it can still make an error in picking the correct speed or duplex of the Ethernet link between the two ports. When auto negotiation fails the links uses another process called parallel detection to choose the speed and duplex of the link. Parallel detection will usually cause the speed or duplex to be set different on both ends of the Ethernet link. The results will then be an Ethernet link that has errors and creates a slow connection.

The best solution is to hard code the speed and duplex of the Ethernet links that are critical in your network. Critical links would be the Ethernet links between you T1 router, T3 router, Ethernet Internet connection, Firewall and switches. Setting the speed and duplex on the critical links will ensure you will get the best Ethernet performance along your Ethernet path.

Check out www.hypersurf.com/ethernet.html

Feb 27

For Google to index the pages of your website the Google crawler first needs to know how to find the web pages. The best way to tell Google how to find your pages is to submit a sitemap to Google. You will need to have shell access to your server and have python 2.2 or greater installed for this script to work. Start by downloading sitemap_gen-1.5.tar.gz from http://code.google.com/p/sitemap-generators/downloads/list. Next unzip and untar the file. Next cd to the directory created by the untar command. The directory name should be something like sitemap_gen_1.53. Once in the directory you will need to create the file yoursite_config.xml. Google gives you a sample file in this directory. Here is the config file I made..

<?xml version="1.0" encoding="UTF-8"?>
 <site
  base_url="http://www.mysite.com/"
  store_into="/home/me/public_html/sitemap.xml"
  verbose="1"
  sitemap_type="web"
 >
   <directory  
   path="/home/me/public_html"
   url="http://www.mysite.com" 
   default_file="index.html"/>

<filter action="drop" type="wildcard" pattern="*/TEST/*" />  
<filter action="drop" type="wildcard" pattern="*/backup/*" />  
<filter action="drop" type="wildcard" pattern="*/.*" />  
<filter action="drop" type="wildcard" pattern="*/*.tar" />  
<filter action="drop" type="wildcard" pattern="*/blank/*" />  
 </site>

Notice I used the “filter action=drop” to overlook files I do not want to submit to Google. You can use regular expressions in the pattern matching here. Now lets run the script to make the sitemap.
python sitemap_gen.py --config=mysite_config.xml --testing
Now have a look at the sitemap.xml. It should be located in /home/me/public_html/sitemap.xml as we specified this in the config file. Review that you have all the pages listed in the sitemap that you would like to submit to Google. If you need to make changes in your config file make sure to rerun sitemap_gen.py and then review your sitemap.xml until you get everything correct. Notice we are running the sitemap_gen.py with –testing. Always use testing until you are ready to submit your sitemap to Google. Then run
python sitemap_gen.py --config=mysite_config.xml
This will submit your sitemap to Google.
You can also resubmit your sitemap using a http request to Google. Here is my http request to resubmit my sitemap to Google.
www.google.com/webmasters/tools/ping?sitemap=http://www.mysite.com/sitemap.xml
Before we submit the request we must url encode everythingafter the “?”. So my http request now looks like
www.google.com/webmasters/tools/ping?sitemap=http%3A%2F%2Fwww.mysite.com%2Fsitemap.xml
Now issue the http request with curl or wget.
wget http://www.google.com/webmasters/tools/ping?sitemap=http%3A%2F%2Fwww.mysite.com%2Fsitemap.xml
Lastly add your sitemap to your robots.txt file.
sitemap: http://www.example.com/sitemap.xml
You have now told Google how to find pages on your site that Google might now have normally found.

Feb 24

When using PF and ALTQ in FreeBSD and using more than 64 queues you must increase the number of queues complied in the kernel. If you have more then 64 queues you will get the following error.

DIOCADDALTQ: Cannot allocate memory

To increase the number of queues edit /usr/src/sys/contrib/altq/altq/altq_hfsc.h and change the value
#define HFSC_MAX_CLASSES 64

Make the value equal to or greater then the number of queues you will use in the pf.conf file. After you have change the file you will need to recompile your kernel. See http://www.freebsd.org/doc/en_US.ISO8859-1/books/handbook/kernelconfig-building.html for information on how to recompile your kernel.

Feb 13

If I have any trouble with my firewall I would like to be able to access the console of the firewall without going in to the office. I have a Cisco 2600 router connected to the Internet with T1 service. I noticed the Cisco T1 router had an extra aux serial port that I could use. I started by configuring the aux port in the Cisco router. In the Aux port I put the following configuration.

router#config t
router(config)#line aux 0
router(config-line)#modem InOut
router(config-line)#transport input all
router(config-line)#speed 9600
router(config-line)#stopbits 1
router(config-line)#exec-timeout 120 0
router(config-line)#exit

Next I configured a loopback interface on the router.
router#config t
router(config)#int loopback 0
router(config-if)#ip address 192.168.0.1 255.255.255.0
router(config-if)#no shut
router(config-if)#exit

Now I must determine what is the line number of the serial port on my router.

router#show line
Tty Typ Tx/Rx A Modem Roty AccO AccI Uses Noise
Overruns Int
0 CTY - - - - - 0 0 0/0
-
65 AUX 9600/9600 - inout - - - 8 0 2177/0
-
* 66 VTY - - - - - 24 0 0/0
-
67 VTY - - - - - 3 0 0/0
-
68 VTY - - - - - 1 0 0/0
-
69 VTY - - - - - 0 0 0/0
-
70 VTY - - - - - 0 0 0/0

On my router my aux port is using line 65.
Now after I telnet in to my router I would then telnet to my loopback address. I would telnet to port (2000 +65). Cisco always uses 2000 plus the port number from show line to determine the port number for accessing the port.
So on the router
router#telnet 192.168.0.1 2065
This would connect me to the serial port of my firewall.
To disconnect from the firewall hold the CTRL+SHIFT+6 keys together then press x. Now you will be back on the router command line. Now type clear line 65 to disconnect the aux line.

To physically connect the firewall to the Cisco router aux port you would use a straight through serial cable.

Don’t forget this kind of configuration could open a huge security risk on your network so always configure your Cisco router to have telnet access from only trusted ip addresses.

router#config t
router(config)#line vty 0 4
router(config-if)#access-class 129 in
router(config-if)#exec-timeout 120 0
router(config-if)#exit
router(config)# access-list 129 permit ip host 192.168.1.1 any (where 192.168.1.1 is the ip of your trusted host.)
router(config)# access-list 129 deny  ip any any log
router(config)# exit

Now your router and aux port will be only accessible from your trusted ip address.
I now can access the serial port of my firewall remotely if I have a problem.

Feb 06

Why a DSL Line:

The first and foremost reason a person would choose a DSL for their internet connection is cost. DSL lines have come down in cost over the years and is now the primary connection type for most residential users. DSL connection speeds are based on the distance your home is from the “central Office”. This is where you local telecom company groups all the phone lines in the area you live. The closer you are to this office, the faster your DSL connection can be. There really isnt any way to get around this limitation, so keep your fingers crossed that you live close to the central office. DSL lines are really not suited for business that have web server or email servers. Most DSL speeds have a limited upload speed. Thats the direction your traffic will be heading if someone wants to view your web site. So if you choose to use a DSL line for a business, you may think about hosting your web site offsite. On the flip side DSL lines are well suited for residential customers. They mainly “download” web pages, and email from other locations. The average download speed for DSL lines is 1.5Mbps. The other issue you should be aware of is repair of a DSL line. DSL lines have a low priority repair with the telecom companies. This means they are not in any hurry to fix your line the same day. They generally fix within a few days, so just be prepared to be without internet if that happens. You want to know why? Its because DSL lines are so cheap. You get what you pay for when it comes to internet connection service. If you require more of a 24/7 service checkout our T1 line services page or our how to connect a T1 page.

Physical Layer: Telephone Jack

T1 jack

The physical layer is the wiring part of a DSL line. In most cases the telecom will wire the DSL line right into your existing inside wiring. The DSL service should come inside you house on one of your telephone jacks, like the one shown to the right. Hopefully you just have one phone number.

Some of people get confused if they have more than one phone line. The easiest way to tell which phone line is on the jack is to call your cell phone from a phone connected to that jack. The called ID on your cell phone should tell you what the number is. If you do this for all phone jacks in the house, you will know which phone number are connected to them.

Equipment: DSL Modem and Filters

DSL Modem Back View

Once you have identified which phone jack the service is one we can proceed with connecting and installing the DSL equipment. You will need 4 things to get connected. A DSL modem, DSL filter, phone cord and a ethernet cable. Your DSL modem will look something like the photos to the right. On the back there will be 2 ports for you to plug cables into.
DSL filters
The first port is the DSL port. You plug a regular phone line(grey cable) from the wall jack and plug it into the DSL port. Then you will plug a ethernet cable from your computers ethernet port to the port marked ethernet on the modem. If you originally had a phone connected to this line, you will want to use a DSL filter like the one on the left. It allows you to connect both a phone and a dsl modem. The small end connects to the phone jack on the wall, then connect the dsl modem and phone as labeled on the filter.

PC Configuration: Dynamic Ip Address

Once you have the DSL modem connected its time to configure your PC. In most cases its already setup to get an ip address automatically. So before doing anything check to see if its already working. If not, then check the following settings. If you have a windows operating system, you need to go to start/settings/control panel, then double click the network icon. You should see your “local area network” device listed in the window. Right mouse click on that icon, and then scroll down until you see Internet Protocol(TCP/IP) and double click. Make sure all setting say obtain automatically. Once these are set click ok. Then check to see that you can browse the internet or get email.

Check out our dsl services at www.hypersurf.com/dsl.html