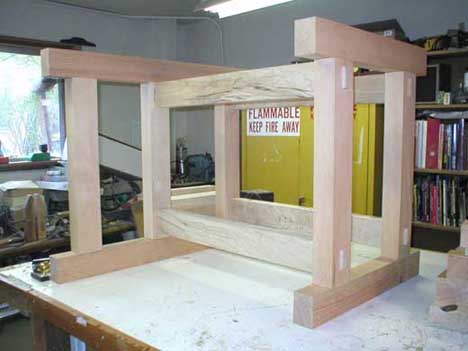
Here's some shots and some notes on making the Base Unit for the Cabinet Maker Bench.
The end "pedestals" are fine straight grained pine - 2 3/4" x 3 1/2".. The joinery is mortise and tenon - the tenons being 3/4" thick by 2 1/2" wide by 2 3/4" long. The top and bottom stretchers are 2" x 3" spalted maple (I got a real deal on this stuff - $3.50/BF for two 8 1/2" wide x 10 foot long 8/4 planks!) with through tenons - 22 tenons total for the base with stretchers.
(there's a story that goes with this wood - Conversation with the Wood. If you'd like to read this amazing tale - click here)
NOTE: TO MAKE NICE TIGHT MORTISE AND TENON JOINTS YOU MUST FIRST MAKE ALL YOUR STOCK HAVE STRAIGHT EDGES, FLAT FACES AND SQUARE CORNERS. YOU MUST ALSO MAKE PARTS THAT ARE SUPPOSED TO BE THE SAME LENGTH ACTUALLY BE THE SAME LENGTH. SETS OF PARTS SHOULD HAVE ALL THE SAME DIMENSIONS. If your stock hasn't been prepared correctly things won't fit properly and things that are supposed to join at right angle won't. Word to the wise ...
I wanted the legs to be flush with the outside of the top and bottom members - all the parts being of the same dimensions because I made them that way - all joined and planed at the same time.
To get things flush required some pretty tight layout for the mortises. Cut the tenons first on the table saw. Having a sliding table with a 48" cross cut fence with a stop made things a bit easier to do 10 moderately large tenons. I had accurately scribed the outside face and the two ends using my Tite-Mark marking gauge - a slick tool for this kind of thing. I'd layed out the inside face of the tenon so it wouldleave some room for paring down to fit the mortise. Set the blade height a little under the outside face (the critical face of the tenon) layout line and made a pass on the end. I snuck up on just leaving the layout line. Then it was just a matter of setting the cross cut fence stop for the depth of the tenon and it was saw and nibble away everything that didn't look like a tenon - leaving the "inside" face of the tenon thick.
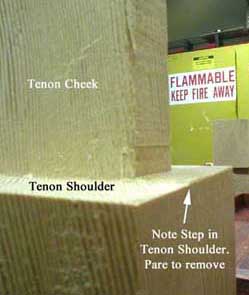
I should probably used my dado blade, but am still a bit intimidated my that much metal with that many carbide teeth spinning that close to my hand. Anyway, after cutting all 10 tenons with the same set ups I found that the end shoulders where a tad high - not good. A little paring with a wide chisel and things became nice and flat all the way around the tenon.
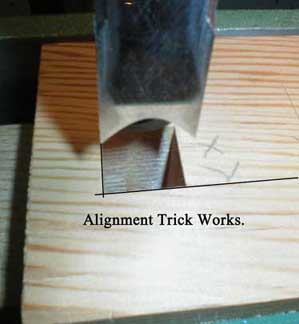
Using the tenons for measurements, I layed out the mortises, again using the Tite-Mark. Off to the General 75-075 M1 mortising machine and a 3/4" chisel and bit set. Cranked the table foreward 'til the fence was up against the back face of the loosened chisel to get the chisel paralleling the fence and locked it in. Much easier to do this part of the set up with an XY table. Put the stock on the table and tightened the hold in/ hold down nice and tight. With a steel straight edge against the front face of the chisel I moved the table until the front face of the chisel lines up with the front mortise layout line. Moved the table to align the left face of the chisel with the left end of the mortise's layout line. Set the depth of cut to about 1/4" deeper than the tenon's length and it was Mortise Time..
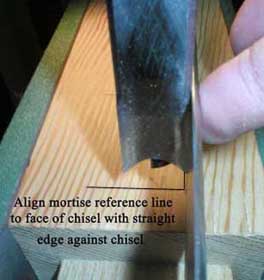
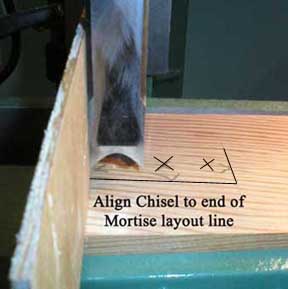
This set up trick works - see?