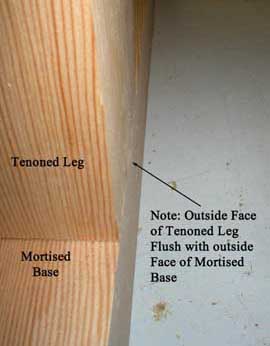
A lttle paring - on the inside and front faces of the tenon, and the tenons on the legs fit snuggly in the top and bottom parts of the pedestal. Nice flush outside faces And the distance between the legs are the same top and bottom and on both pedestal units. A brief pat on the back and a proud grin before going on to the next step.
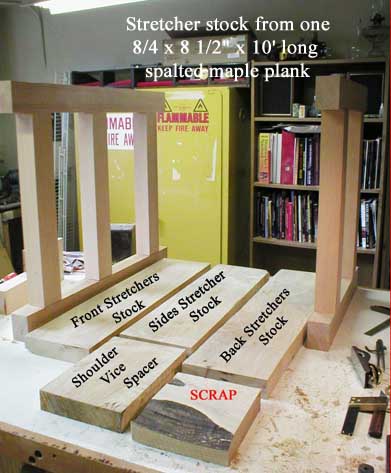
With the legs/pedestal mortise and tenons done it was time for the stretchers. That's where that 10 foot long 8 1/2" wide by 8/4 thick spalted maple plank came in. Cut it into managable pieces, a couple of inches longer than final length, joined a face and an edge then used the planer to get the other face paralleling the flattened one. Planed taking very light cuts. Took a little longer but avoided tear out. Set the rip fence to 3" and ripped the stretchers to width.
Cut the stretchers all to the same length on the SCMS making sure each piece was firm against the length stop. Layed out the stretcher tenons and cut them on the table saw using the sliding table and the cross cut fence with it's stop to keep everything the same.. Left the "inside" face of the tenon "fat" to allow for paring to a nice tight fit in the mortise later.
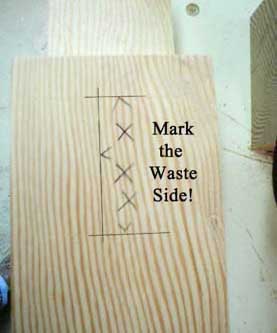
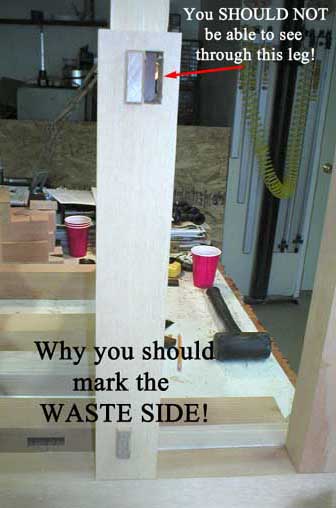
Using the tenons to get measurements, I layed out the mortises with the Tite-Mark wheeled marking gauge. These were going to be through tenons so I popped a piece of MDF under the stock and set the depth stop. NOW LISTEN UP - after you layout a mortise, MARK THE WASTE! On the second mortise I got so hung up on alignment of the chisel to the layout lines I failed to note that I was lining up the chisel to the WRONG SIDE OF THE LAYOUT LINE. Took the mortised piece out of the mortising machine to inspect my handywork. That's when my screw up became glaringly obvious. Back to the mortising machine to cut the mortise in the right spot. Will put a patch in later but have a look at the right image below for a chuckle.
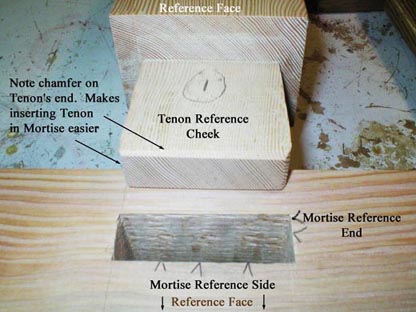
Chamfered the ends of the tenons and pared the "inside" and top faces of each tenon to fit (the front and the bottom faces of the tenon are the Reference Faces). Pare, test the fit, pare some more, test the fit and eventually the tenon slips into the mortise with a little firm push. Nice and only seven more to go.