Movement - K'NEX Tethered Power Pack Motor - 1: Seminal Piece #1 - Biologic Imperative - page2
Having done a full scale drawing of the Sperm Component based the KNEX motor and gears, and looking around for a chunk of wood of sufficient size to turn - and not finding one - it was modify The Plan Time.
They say that LUCK has a lot to do with preparation - and fortunately I had an option available if the KNEX thing didn't work out - another motor and gears set up from Tamiya- their Universal Gearbox unit (part no. 70103+500 - about $10)
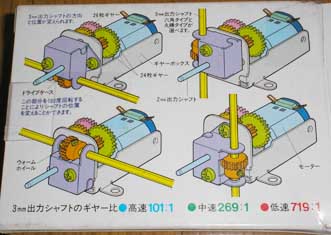
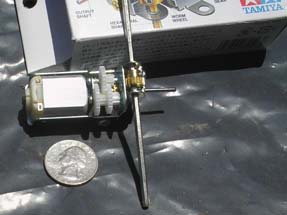
Did a full scale drawing of the Tamiya and then worked out dimensions for the Sperm Component using it.
I had a box wood blank that was the right size - and the perfect wood for this component - easy to turn, easy to carve and shape, almost white and almost NO noticable grain..Mounted that sucker between centers, penciled in some control points off a print of the full scale drawing and, with a "spear" parting tool. turned close to the 2" diameter into the blank. Then it was Make The Chips Fly time!
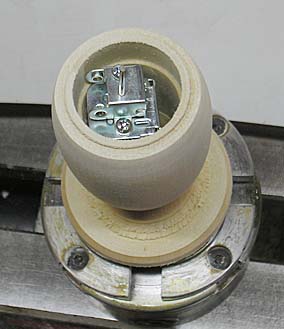
Having done some lidded boxes before, I went at this thing as if it were just another lidded box - with a very tall top. I got into the turning and forgot to take digital images along the way. Basically I turned a tenon on the "head" end for later chucking and turned both the "head" and "tail" between centers while the blank was still one piece . Parted off the "head" and drilled the stepped hole to the depth and dimensions needed to accomodate the GearBox using two forstner bits and a jacobs chuck in the tail stock end.
Note the lip in the top of the "box". Because the "tail" won't actually connect to the box, but rather to the shaft on the end of the motor and gearbox, the internal mechanism and the "rive shaft" that'll spin the "tail" won't be seen when the piece is put together.

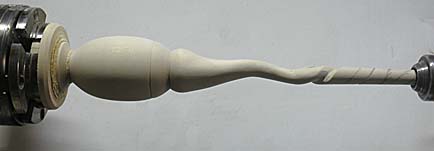
The "tail" was turned to blend with the box by using the "box" as a friction chuck - like I saw Cindy Drozda do in her demo for our turning club. The narrow end of the tail was chucked up and the other end centered up with a live center in the tail stock. Once centered I could drill the hole in the bottom of the tail for the motor shaft to fit in and glued to. Once that hole was drilled I could start working on doing the spiraling in the tail.
The semi-spiral "tail" was done by wrapping a piece of blue masking tape around the original curved tapered part and penciling in a line along one edge of the tap. With a fine toothed thin kerfed dovetail saw that cuts on the pull stroke like a japanese saw, I sawed a shallow kerf along the spiral pencil line. Then a little work with a chisel from the "off cut" side towards the kerf then some sanding with a PROXXON variable speed disk sander to get the basic shape followed by a LOT of hand sanding and shaping.
To see the YouTube video of this thing in motion CLICK HERE and then click on Flagella2.
Now all I have to do is center the motor and gearbox in the bottom of the box and then figure out how to drill lthe holes for the wheels drive shaft in the right spot to while keeping the end drive shaft centered and the rest will be fairly trivial. Keeping everything aligned properly will be tricky - but I'm banking on coming up with a simple solution when I need it. Making the eccentric wheels shouldn't be any trouble.
The really tricky part is going to be getting the balance of this Sperm Component right so that it's tail heavy. THAT's going to be the tricky part since the motor weight will be well in front of the wheels. So this one's going to require another Leap Of Faith - that an anticipated problem will be solved when the time comes.