Having develop a little familiarity with setting up and use of the laser, Corel DRAW and the laser "printer driver" parameters - power, speed the head moves, DPI and how often the laser fires per second (Frequency), for the third session with the laserI figured it was time to try "engraving" on CURVED surfaces. The jig I made to hold the chuck that would hold the turning to be engraved was going to get its first use.
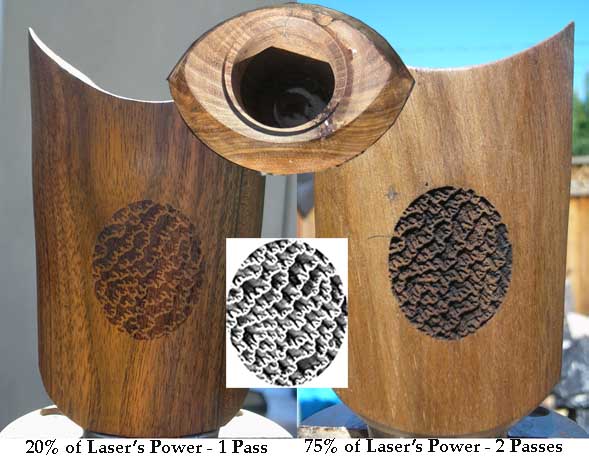
This first image show the Two Intersecting Arcs black walnut test piece #1. The radius of the curves is about 2 1/2", the piece about 3" wide and about 1 3/4" "thick. The image used has plenty of high areas and no straight lines. The results on the left is subtle, the depth of cut quite shallow due to a low laser power setting in the "printer driver's" parameters. The results shown on the right is much more a carved pattern texture done with two laser passes and much higher laser power settings. The crispness of the high areas deteriorated some but that could be do to the laser's "table" flexing and trampolining a little when the laser head stopped or started suddenly while burning the pattern.
The second sample was a bit wider than the first, with larger radii for the two arcs and wider as well. As you can see, the curvature of the piece didn't cause a deterioration in the quality of the results due to loss of focus at the left and right sides due to the curvature of the surface.