Finally turned a piece specifically to do a low relief 3D "carving" on. The wood is a ctirus - either orange or grapefruit. Almost all white and almost no visible grain - and almost dry - perfect for laser "carving".
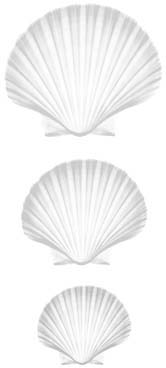
Found the perfect Gray Scale Image to use - an X-ray of a shell. X-rays don't have shadows - light and dark are determined by - THICKNESS. The tops of the "ribs" on this shell is where the shell is THICKEST. the bottom edges of the ribs are where the shell is thinnest and more transparent.
Note To Self:
3D Gray Scale Images are hard to find on the web. BUT if you search for X-rays AND image - you'll find all sorts of interesting images that probably would make interesting low relief lasered carvings.
So here's what was lasered - an X-ray image of a fan shell. I tweeked it in PhotoShop to get the grays in the RGB numeric values between 0,0,0 (white) and 150,150,150 (a bit over half way to pure black). I mentioned this earlier when going over what the laser does when in 3D mode - but it's worth repeating. From pure black to mid gray - the results look basically the same. But the closer you get to BLACK, the more charring and loss of detail you get in the finished piece. Let me emphasize that.
NOTE TO SELF:
KEEP THE "GRAY" RANGE OF YOUR IMAGE BETWEEN WHITE AND HALF WAY TO PURE BLACK
- RGB VALUES 0,0,0 (WHITE) AND 128,128,128 (MID GRAY). THIS WILL MINIMIZE CHARRING AND LOSS OF DETAIL - AND MAKE CLEAN UP QUICKER AND EASIER
This image is at 72 dpi. The one I used for the laser 3D job was at 600 dpi and done in 3 passes at reduced power - to get the depth - but not lose MUCH detail.
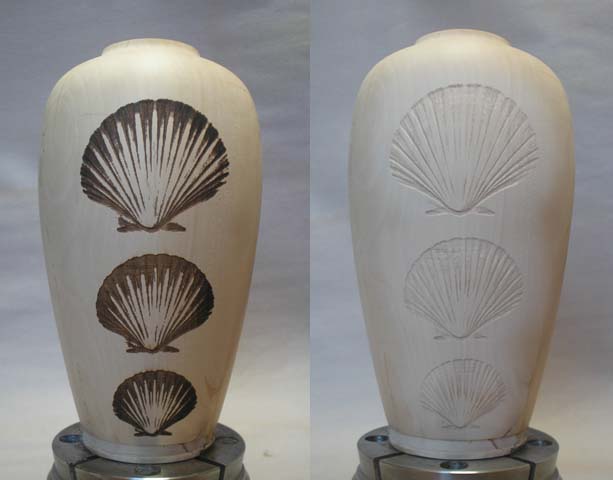
Here's the vase AFTER lasering and AFTER cleanup with an airbrush sized sandblaster / air eraser, shooting 200 grit aluminum oxide abbrassive, the finest "sand" I could find. I've since recalled reading about "soda blasting" - using BAKING SODA as the abbrassive. Baking Soda, availabe at any grocery store, removes charring a bit slower than 200 grit aluminum oxide, but it also removes less detail in the "carving".
Note to Self:
Use Baking Soda as your sand blasting clean up medium
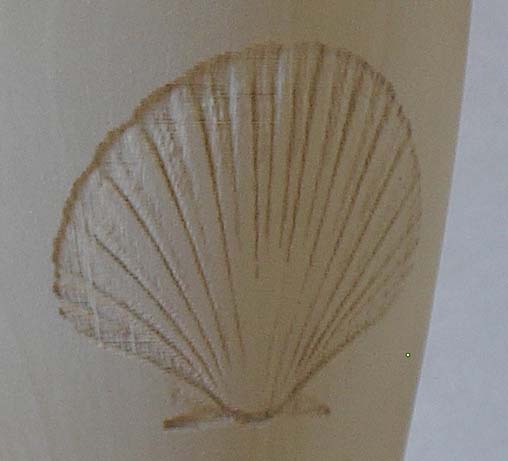
Here's a closeup shot of part of the design after cleanup. As you can see, the design is cut down into the piece. My plan is to use a mid gray background around the image so that the background will be at or below the outside of the shell and the shell will sit proud of the surface- as if an overlay.