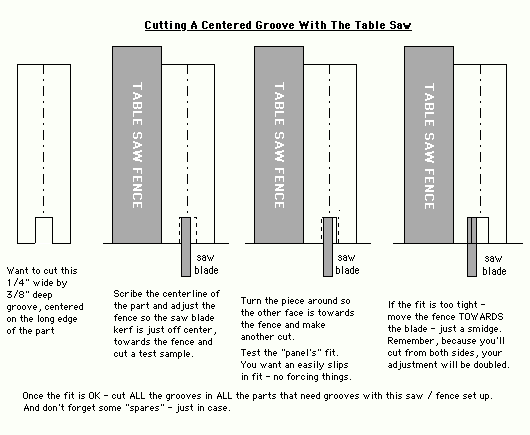
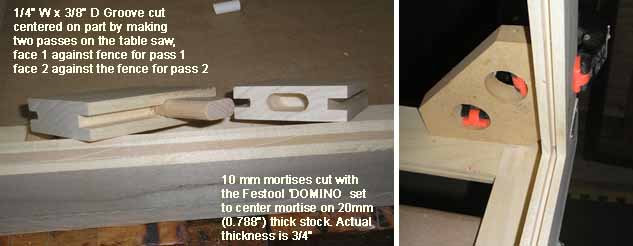
Next - the groove for the panels - 1/4" wide, 3/8" deep. They can be routed on the router table, cut with a tongue and groove plane - or cut on the table saw. Given the length of the stiles - 95", the number of parts that need grooving and the experience level of the mentoree - it was the table saw for making the grooves. And it's always a good idea to center them on the stock width - so you can use either face of the parts as the Show Face. (Read that again. At this point in the project we haven't gotten to the wood's grain and how it will flow. Remember, the piece will be stained or dyed and the grain will show. So we haven't selected the Show Face of any of the parts. That will come later, when the parts are cut to size and placed together as they will be in the finished piece. By centering the grooves for the panels, and the mortises for the loose tenon joints, EITHER face of each part can be made the Show Face.)
Some details pictures
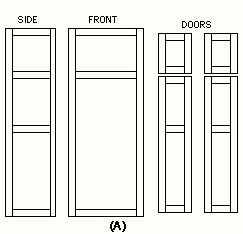
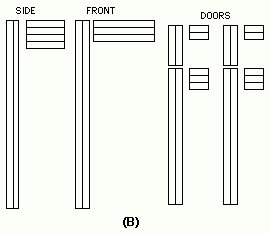
There are going to be a fair number of parts for this thing. When they're where they are going to be it's easy to see what goes where (A). And when you group them by "assembly" it's still pretty easy to keep track of what goes where (B). But if you're not careful things can get pretty mixed up pretty quickly.
![]()
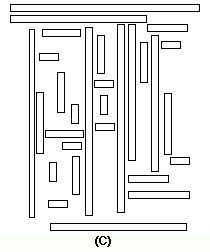
Can you look at (C) and quickly tell which parts are part of a set - and what other parts are in that set? Can you tell which way's UP, which side of a part is Left and which face of a part is the Show Face - without looking at its other side first?