No matter how hard I try, I can't stick with K.I.S.S. (Keep It Simple Stupid). Maybe after I've made a hundred or more projects I'll be able to foresee options and possibilities from the get go and maybe even do full scale drawings,, working out ALL the details before I actually get to cutting any wood - but I doubt it.
Things began simple enough - per the initial sketch of the idea and the starting dimensions - as is typically the case for me.
I started out making the parts. Parts that are supposed to be the same length were made so on a miter4 saw - with extension tables AND Stops! Decide on a length, set the stop and cut ALL the parts that are to be that length with this set up (and it's not a bad idea to make a spare of each type of part - at least for the first piece of a set you are going to build. Figure it's an insurance policy - you don't need it 'til you need it). Things that are supposed to be the same width are ripped with the same fence set up - plus a spare or two - just in case.
So far, so good. On to the joinery.
I have a TREND Mortise & Tenon Jig (close that window when you've looked at the jig)- tricky to actually use for true mortise and tenon cutting - but very easy to use to cut just mortises. You only have to layout the centerline and ends of the mortise, regardless of what the mortise width is going to be. Clamp the part in the jig, use their guide set up bar to center the jig's guide on your centerline, Put their 2 1/8" guide bushing in your plunge router, select and install a bit and you then need only to set the end stops. Put the router on the guide, bring the bit down to the wood and align it to the mortise end line. Slip a stop agains the bushing, lock it down and do the other end of the mortise.
I had a fair amount of 1/2" Baltic Birch ply so I decided to use them for the loose tenons. Rip to the mortise height, round over the edges on the router table and cut off pieces as needed. I also had an Onsrud 1/2" upcut spiral bit for the mortises - MUCH better than a groove/dado bit - cuts cleaner, faster and deeper. Word to the wise?
Now, because I wanted to center the apron and stretcher parts on the legs to avoid dealing with the rounded edges of the S4S redwood legs, scribing the center line was critical. Fortunately, Glenn Drakes Tite-Mark (close that window when you've looked at the tool) is perfect for that - as well as several other typical layout "challenges". Guess a setting, scribe a piece of scrap of the stuff to be marked and repeat from the opposite face. If there's an overlap or gap between the two scribe lines you dial in half the difference and try again. Usually get it right on in three tries or less. the Tite-Mark also has a pair of add-ons for mortises - a pair of independently scribing wheels for mortise lengths or width. Very easy to set to a tenon then offset from a reference edge for actual marking/scribing.- if you're within about 5 or 6 inches of your reference edge - the Tite-Mark has limited reach.
Cut the 5/8ths inch deep mortises in all the parts - AFTER MARKING THEM FOR ORIENTATION. Did you get that? MARK YOUR PARTS! Let me repeat that - That way you'll know which are your reference edges, which is left and which is right and, what's the front vs the back. Also handy to know which end is the top. If you don't get in the habit of marking your parts I guarantee that at some point, you'll make two left legs - or cut a groove for a drawer bottom near the TOP edge of a drawer side - so be sure to make TWO EXTRAs of each critical part - you'll need at least one of them.
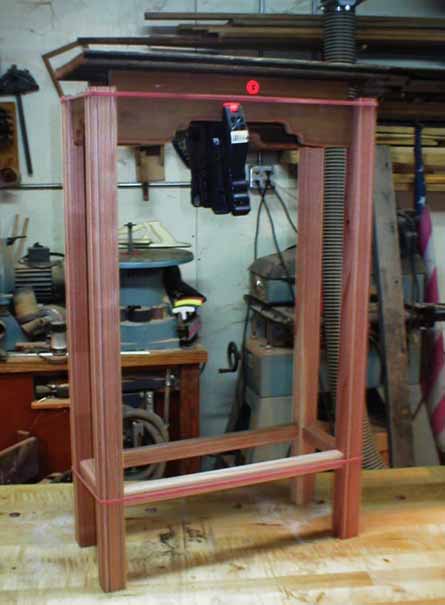
After assembling (the nice thing about tradional joinery - self aligning and self supporting and you can take it apart and put it back together again as often as you need to) what I had things looked just too "vanilla". Functional - but not very interesting.
Here's the way through my evolution of the design. In the photo below, I'd clamped a board to the inside of the aprons of the one in the front just to see what lifiting the top off the arpon would do. I liked the idea so headed off in that direction.
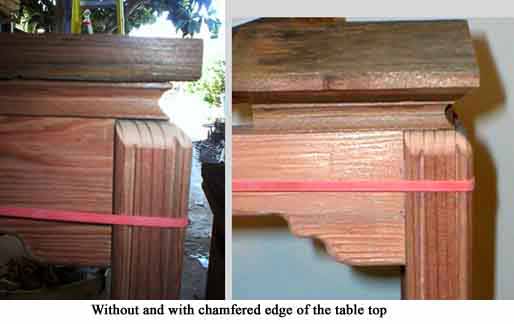
And here's how they evolved from simple to - well - not so simple. Should've gone with 3/4" roundover on the outside of the legs rather than a bead - oh well - next time.
See what I mean about not being able to stick with K.I.S.S.?