Go With The Flow
Ya ever have a piece you were supposed to make? And as you make it - it develops a mind of its own? And you go with the flow - not knowing where it'll take you?
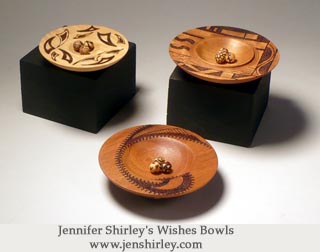
Jennifer Shirley recently posted pictures of her newest Wishes Bowls to WoodCentral's Turning Forum.- They triggered an idea.

Combine her idea with a Drozda type lidded box with an overhanging rim and a finialed lid that had a concave base. Put a small ball in the concavity of the lid and a few more inside the box- and they can roll around as you handle it. Take the lid off and you can get the balls inside the "box" to also roll around - slow or fast - you decide. Hold the bowl and rock it - and the balls inside will roll back and forth. If you rock it right, the balls will spin into "orbitals", rising up the side of the bowl the faster you move it.
So I "drew up" the basics of this thing in a primitive CAD program and a week ago I posted this illustration to WoodCentral''s Turning Forum just to throw out an idea.

No good deed goes unpunished. It was "suggested" that I actually make one. Oh sure, like THAT was going to happen. I had access to a laser engraver and THAT was going to fill my To Do List for a while.
But sometimes The Universe, or Muse if you prefer, seems to change one's priority list.
I'm out in the shop "rearranging things" to work on the low relief "carving" samples I'd lasered ( "rearranging" involving cleaning off some bench top surface area to put the samples on. If your shop is like mine, you know that this means making space for the stuff that has to be moved, which, in turn means moving other stuff to make room for the stuff you have to move, which, in turn means moving . . .).
During the "rearranging" process I found a hollow form I'd started - and abandoned - due to a crack that developed in the rim.
Hmmmmm. I'd only hollowed right around the rim so there was plenty of wood below that.
Hmmm. If I turned off the top part - I could make it into a flat topped rocking bowl. I'd already done a flat topped, undercut rim, bowl
Hmmmm.
And one thing has lead to another - thanks to The Universe / Muse., "Why not add THAT undercut rim idea?" the Muse asked.
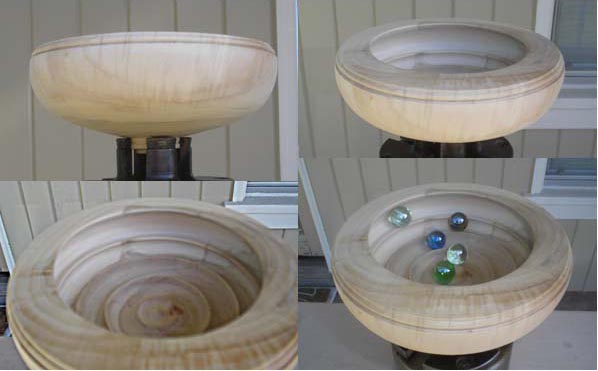
Some reshaping, some undercutting, some hogging out the middle a bit. And as long as I was undercutting, why not turn concave "steps" up the inside for the balls to roll in?
As luck would have it, a former Significant Other had made me a small leather pouch - with marbles in it - fearing that I might Lose My Marbles otherwise. And, as luck would have it, I'd kept it all these years - AND knew where it was.
MARBLES!
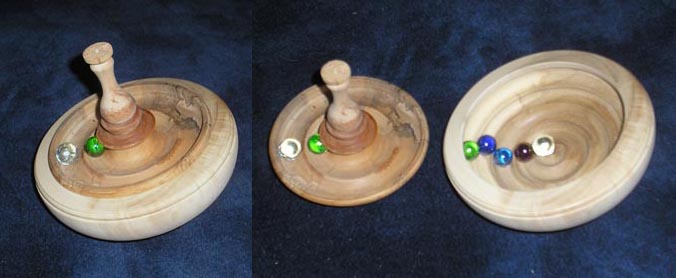
And if I turned grooves in the inside wall of this bowl - I'd have tracks for the marbles to roll in. Here's the idea.
It seems that listening to your Muse works - at least so far - see!
Next - the finialed lid - with a concave base. Had a rough to round VERY DRY piece of what I think is spalted birch - not the best choice - but I had it and it was DRY - very, very,very DRY - almost crumbley dry. Found a knot inside that wasn't visible from the outside and because the wood is so dry - and spalted - it tears rather than cuts so there's been a lot of work with the 80 GRIT "gouge". Don't know yet if I'll be able to turn an integral to the lid finial due to the hidden knot or if the wood will be able to be turned to a semi-elegant finial. Will give it a go. If it doesn't work out - well I'll try again - with better wood.
Man is the wood for the lid "challenging". Turning the lid has been a royal PITA. The wood, being spalted - and VERY DRY - tears and chatters and shreds, etc. Probably have used a 2 OZ bottle of CA glue trying to get things hard enough to cut - or even sand - smooth,
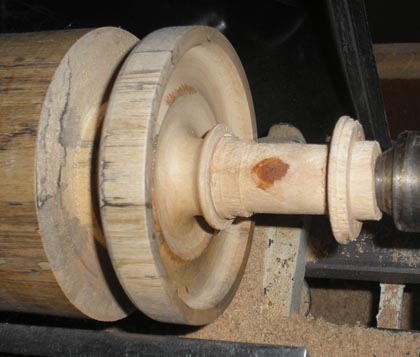
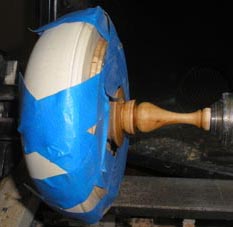
Used the "box", which still has a tenon on the bottom, as a jam chuck for turning most of the finial of the lid - a lot of blue tape to hold it in place and the tail center lightly supported the top of the finial end. While getting the finial roughed to shape and size - I heard - a POP.
You guessed it - the lid split open - #%&^#**%###!.
Off to The BORG for a big enough band clamp, some MORE CA glue and an hour of waiting for the CA to have plenty of time to dry and set. When I loosened the band clamp I held my breath, knowing the crack would open up despite the CA glue. Thankfully, it didn't.
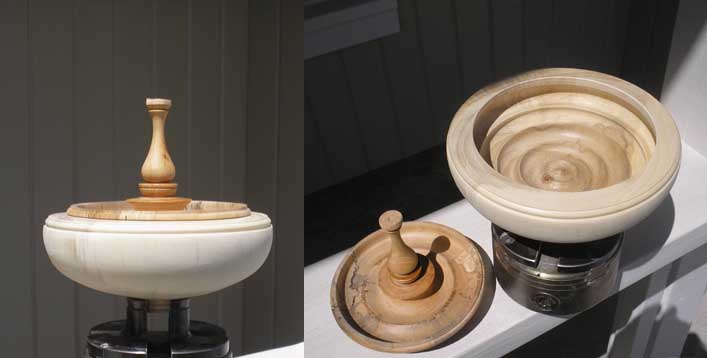
Got it to this point just before our monthly turning club meeting so I took it for Show & Tell as a Proof of Concept piece. I intend to thin down the finial quite a bit, leaving a small concave hemisphere on the top - to glue a marble in. The lid and finial spalted wood isn't all that attractive - so maybe some black gesso or some other opaque "surface enhancement" will improve things a little. (This is called Wingin' It, Just get started - details and "challenges", along with solutions, will come along as you go)
Maybe refining the clunky finial would help. Since the "box" still has its tenon, the box can act as a jam chuck for working on the lid's finial. A little Blue Tape (thanks to seeing Cindy Drozda use this trick in her demo) a lot of very light cuts, a bit of sanding and a coat of wipe on lacquer and the finial looks a little less chunky. Will finish it to a semi-gloss before removing the tail center and turning the space on top for a marble.
Looks better without the tape.
Now for the tricky part - turning the concavity in the top of the finial for a marble to go on top. Withoujt the live center, only the tape holds the lid with its finial - so very light cuts - LOTS of very light cuts. Don't want to blow it this close to the finish line (ok so there's still the tenon on the bottom of the "box", some sanding and some buffing - but that will be easy.
Well that went fairly well. Here's what I've got so far - with marble.
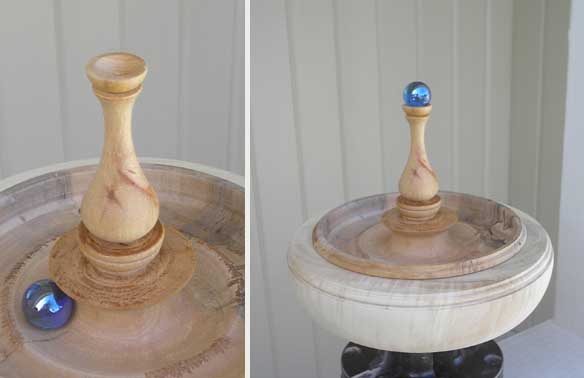
At this point two things I'd not thought of presented themselves. First - the round bottom means the piece won't sit up stragitht. The second issue was holding this thing in order to rock it to get the ball inside to roll around. What was needed was obvious - a pedestal - to hold the piece upright - and act as a a handle for spinning the marbles inside.