You've seen the concept in 2-D. Now for some photos of four quick and dirty samples as you can see. I left quite a bit of flat surfaces to make it easier to bandsaw the slices The flat surfaces will also make stacking them easier later. The samples were turned just with a skew, lines scribed with a marking gauge then penciled in and labeled. Since there will be TWENTY slices - MARK THE PARTS!
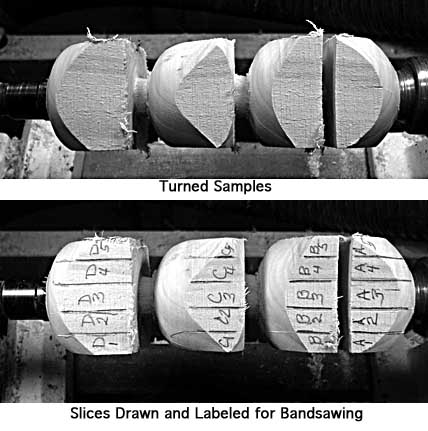
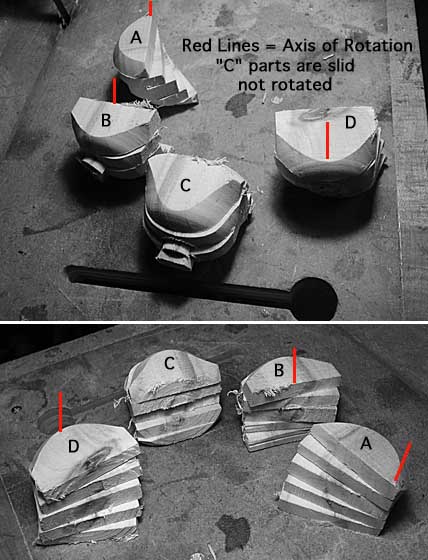
Off to the bandsaw - some quick (but VERY careful) slicing and then some playing with sets. I've added red lines to identify the axis of rotation for each set of parts.
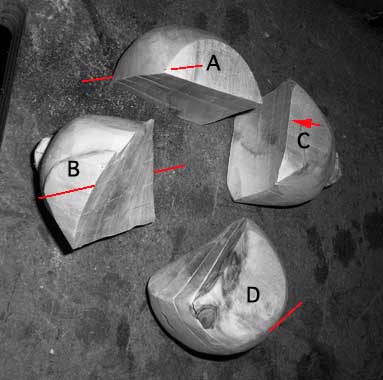
Set "A" rotates each slice about one "corner", each slice being rotated about 10 degrees relative to the previous slice.
Set "B" rotates each slice about the Top Center - the bottom two slices rotated counter clockwise, the top two rotated clockwise.
Set "C" merely slides slices along the centerlne of the whole piece.
Set "D" rotates each slice about its Bottom Center
Glued the sets up, reducing the increment rotation by about half. Used the Rigid oscillating belt sander to remove the obvious stepping on the outside then switched to the PROXXON mini disk grinder/sander to work on the tops and smooth up the outside some.I put a quarter in the middle of the sanding disk for scale.
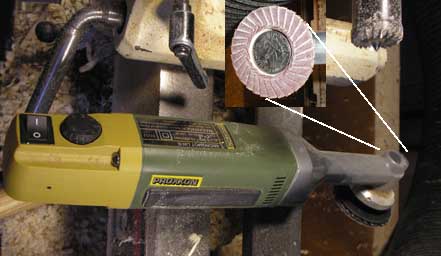
I'll glue the sets up, though I'll probably reduce the amount of rotation, then use a small disk sander (PROXXON) to do some smoothing and blending of the outside surface and round over some or most of the hard edges of the "steps". When I've got the outside more or less the way I'm satisfied with it I'll use a flex shaft and some burs to hollow out the inside of the object. What happens after that - who knows. If this idea works out I'll do more complete samples and continue exploring. If I turn the samples to full round cross sections I'll have to figure out a way to hold them for bandsawing.
More to come