Reverse Engineering a Multi Axes Turned Piece Using SketchUp
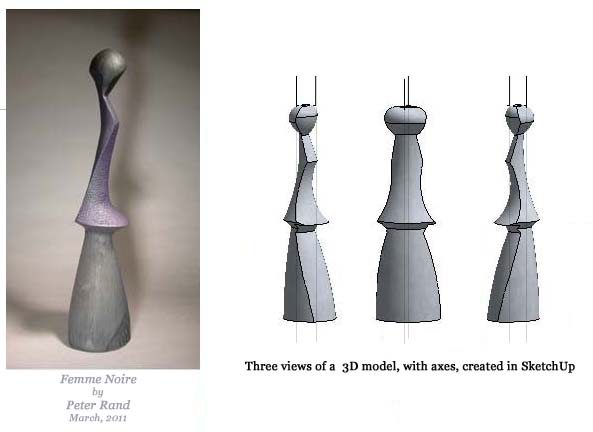
So far, we've been working with what I think of as simple spindle versions of mutli axes "primitives" (Cove & Bead cuts, "V"cuts and Straight cuts) - using two axes and two intersecting arcs - and how to DESIGN them. Now it's time to do some "reverse engineering" - to work backwards from photos of a multi axes piece and building a virtual 3D model of it.

Here's how this SkektchUp model was created.

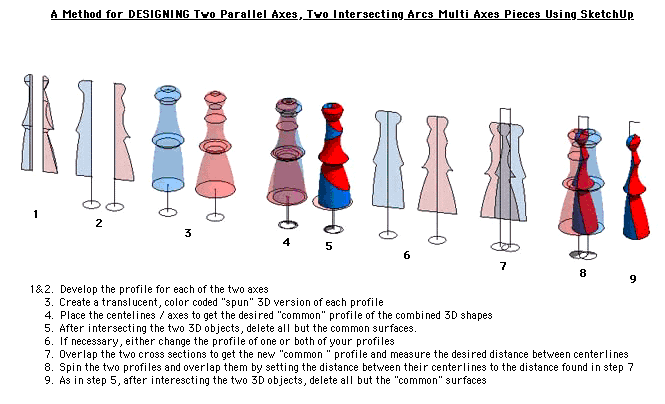
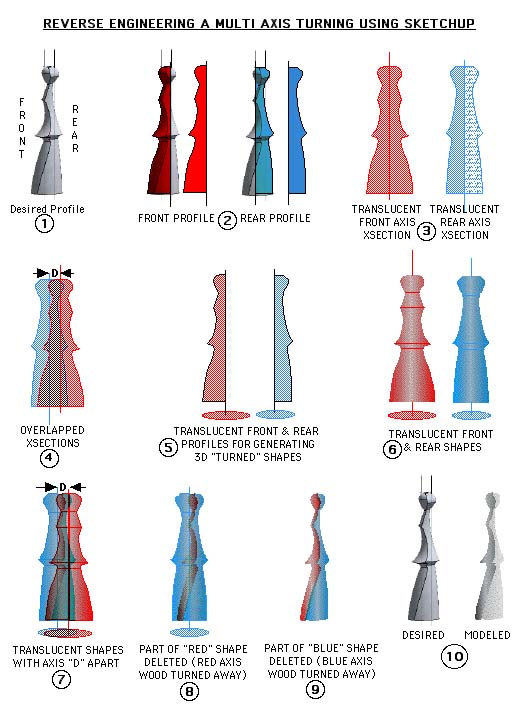
As you can see from Step 5, I didn't get the desired look of the original piece. The centerlines of the front and back profiles were too close together, resulting in a rather "Rubinesque" figure. To slim things down I merely had to move the centerlines farther apart as shown in Step 7 in order to get the desired effect shown in Step 9.
Here's the illustrated procedure fleshed out better. You can download the image, print it and use it if and when you get around to playing with SketchUp.

And if you want to download the SketchUp file all this stuff came from - click on this image. Be aware that this SketchUp file is close to 9 megabytes.

If you'd like to see a YouTube video of all this in virtual 3D - CLICK HERE.
If all lthis has been "Greek" to you, you might want to go through my multi axes concepts web pages, which I hope will make all this more understandable.
CLICK HERE to get to the Multi Axes Concepts Primer