We started this Turning Miniatures Journey with the basic spindle cuts, lines, grooves,V cuts, coves, Ogees, and rounding cuts. Then we did some end grain cuts. We used some of those cuts to turn
- a plate
- a bowl
- a hollow form
and
- a hollow form with finial
Now, let's put all the pieces together and add a pedestal - to do THIS - shown about actual size.
That's a penny the pieces is sitting on.
(Saw some of these in one of Robert Chapman's book - a couple of years ago and had forgotten about them - 'til now)
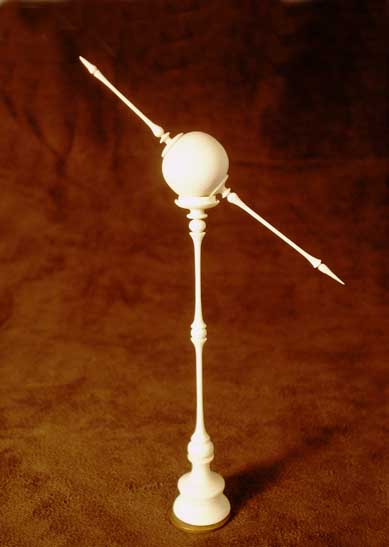
Looks kind of complicated and tricky. But if you break it down into its four parts, it's just a sphere, a finial, an icicle and a pedestal. The only thing new is the pedestal - and that's just some spindle turning, with a little plate at the top for the sphere to rest in/on.
Let's break the turning down into the pieces, in the order to turn them in with some Step By Step HOW TO illustrations (and YouTube videos)
Note: Each "page" is a GIF file you can download and print. With a printed copy of each illustration and a pencil, watch each video and add your own notes to the illustration's page. Then take it to your lathe and turn some parts. You'll be surprised to learn this really isn't that hard to do.
Why not head out to the lathe - and turn your own version of "IT"?
Still not sure? Well how about if I show you, in HOW TO illustrated Step By Step diagrams you can print - with accompanying videos showing the actual turning?
CLICK HERE for the Step By Step illustrations and links to the videos for each one.