Blending a Finial or Lid to a Hollow Form
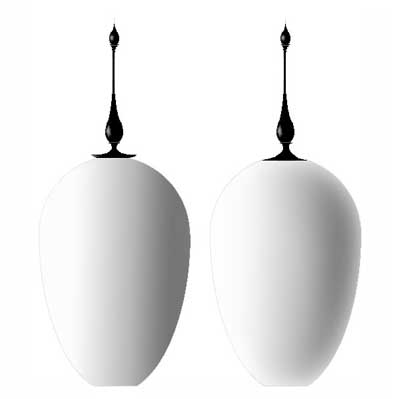
Typically, when a finial or lid is added to a hollow form - it's a Stuck On - clearly a seperate piece - stuck on top of the hollow form. The demarkaction between the hollow form and the lid or finial is distinct, often emphasized by having the finial or lid a different type of wood or a differrent color than the hollow form, and often with its own curves that are quite different from the profile of the hollow form.
There IS another way to add a finial or lid to a holow form that's a bit less visually abrupt and creates what is argueably better "flow" - BLENDING the profile of the top of the hollow form and the bottom of the finial together
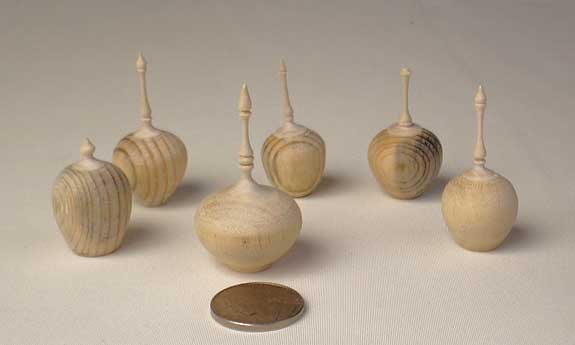
Blending a finial or lid to a hollow form is a bit trickier than doing a Stuck On, but the effect can make the extra effort well worth it. Here are six miniatures turned while video taping a demonstration of the method used to create them.
Here's one way to do a Blended Finial. The method works for Blended Lids as well.
NOTE: Begin with a finail blank half again as long as the finial you have in mind.
This will give you some room to recover if you blow the fit of the bottom of the
finial to the hollow form's stepped opening. Unless you're really lucky, you WILL
overshoot the fit the first attempt or two, especially when do a miniature. When
you DO, part of the OOPS and try again.
One of the trickiest parts is turning the stepped opening in the top of the hollow form and then turning the bottom of what will be the finial or lid to fit that stepped opening. Make the stepped opening in the top of the hollow form too deep and you'll punch the finial through the top of the hollow form when blending the two together.. Make the step too shallow and you'll leave a knife edge on the bottom of the blended finial that will be damaged when later sticking the two parts together.
Normally, you'd turn a Stuck On Finial (or lid) from its tip back tothe teno on its bottom. If the bottom tenon is a bit small for the opening in the top of the hollow form, a little medium CA glueor a couple of coats of shelllac will fix that. And if the tenon is too big - well a little wittling will take care of that. But witha Blended Finial (or lid) the fit has to be right - or the "blending" won't work. BUT - if youy start with the finial's tenon FIRST, if you blow the fit, just part the mistake off and try again.
To do the actual "blending" the finial (or lid) and the hollow form MUST BE TURNED TOGETHER - relying on a friction fit - the soon to be finial held in a scroll chuck and the hollow form pressed against the bottom of the finial using a "cup" live center on the tailstock end. That's where the "step" in the top opening of the hollow form comes in. It's that "step" that keeps the finial (or lid) from being pushed into - and through - the top of the hollow form.
Even with that "step", you CAN, if you apply to much pressure from the tail stock end, punch the finial INTO the hollow form. If THAT happens you've got a DO OVER! You want to apply just enough tail stock end pressure to permit you to turn the "blending" area. The sharper your tool and the lighter the cuts for the blending, the better.
Once the blending of finial to hollow form is done, remove the hollow form and the tail stock - then turn the rest of the finial. Work in short sections towards the headstock and sand and finish as you go.
NOTE: WHEN SANDING, DO NOT PINCH THE FINIAL - IT WILL SNAPOFF!
To see the YouTube video on blending a finial to a hollow form, CLICK HERE.
I hope that all this, and the accompanying video, will get YOU at least thinking about turning a hollow form with blended finial.
If you have questions, comments on all this, or suggestions for improving it - please e-mail me charlieb@accesscom.com