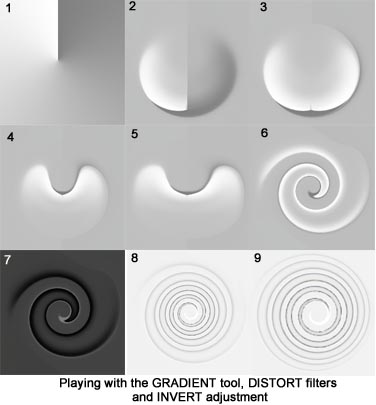
Now that you've seen some of the PhotoShop Tool Menus and Pull Down and Pop Out Menus and have seen how they can be used - let's do some more playing in PhotoShop.
This time we'll start with the GRADIENT TOOL's "slit and twisted paper" gradient option - and - like the earlier example, use it to fill a new 5"x 5" new work space. by placing the cursor in the middle of the page and drag up to the top center of the space (1). Again, well use the elliptical marque tool to select a circular area of Step 1 whose top is at the top-center of the page and whose bottom is a about a quarter inch below the bottom of the "slit". COPY this selection and PASTE it back on the original image.
In the top menu bar, CLICK and HOLD on WINDOW AND DRAG down to open its Pull Down Menu. From that Pull Down Menu, highlight SHOW LAYERS and CLICK again to open the LAYERS window. You should see TWO layers, your "slit and twisted paper" gray scale image, and your selected circle.