Left Wall Hanging Tool CabinetOn the left - a wall hanging tool cabinet. The carcass and doors were made when I was making the right wall hanging tool cabinet. Making the pair together allowed me to use the same set ups when cutting parts and making joints.
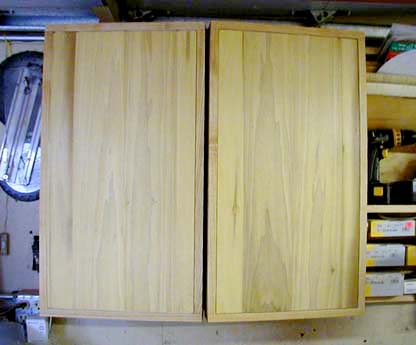
Ash with Poplar Panels
Note the Piano Hinges. The doors are going to carry a bit ot weight
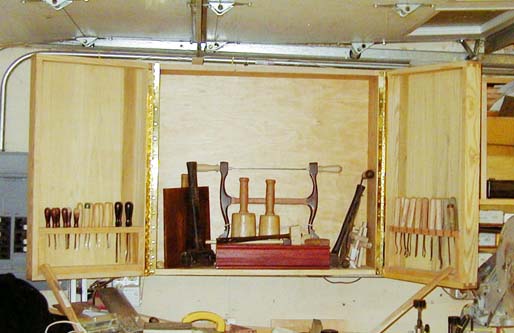
I've started filling this one up - first with carving chisels which seem to multiply like rabbits. I know it will have to hold several carving mallets, a Stanley #7 which is really a long sucker, a Stanley 45 and 48, the bow saw I made, a hacksaw or two and god knows what else. Like the already filled right cabinet, I'm sure modules will evolve to fill ALL the available space in this cabinet.
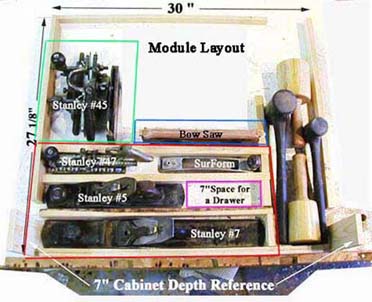
Here's the initial layout for the inside of the cabinet. I marked the outline of the space available inside the cabinet on my white work/assembly bench. Ripped some douglas fir to 1/2 and 3/4 inch - the thickness of the modules I plan on making. I cut two pieces to 7 inches - the depth of the cabinet - and put them at the "bottom" corners so I'd know what the limits are in the "Z" direction.
What I came up with so far are three initial modules
- the Red Module for the Stanley #5, #7, #47 and the Surform - with room for a 7 " wide drawer
- Green Module for a box for the Stanley 45 combination plane - with cutters
- Blue Module for a box to hold the bowsaw
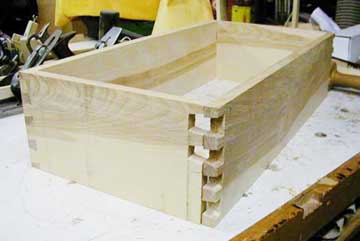
Decided to go with hand cut through dovetails for Module #1, the Red Module, half inch thick sides and bottom, 3/4 inch thick for the top since it will later support the modules which will go on top of it. Did the pins first - chopping out the waste with chisels and then switched to a coping saw to remove the waste between the tails on the side pieces. Good thing in way. Here's why.
Found the waste pieces though, so I can glue them in at assembly time. Won't have much strength but visually will be ok. Will hide it on the bottom of the module and back in a corner where "no one will ever know".