Buidling a Sharpening Center Cabinet - page 4
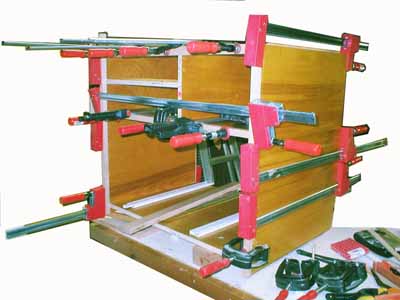
The glue up of the ply carcass was done in a couple of phases. One end of the biscuit joined parts were glued up first - making sure that things were nice and squared up. Did them at the end of the day so they'd be all set up the next morning when the carcass glue up was done. Did part two, again making sure things were square and let the glue dry for a half day before starting the maple face framing. Did the side uprights first and then used The Sticks" to "measure" and cut the rest of the face frame parts. Used about half the clamps I own.
The two drawers are to be made using half inch 9 ply baltic birch ply - common for kitchen drawers. Tried to use a Drawer Lock router bit for the joinery . But it doesn't work well on half inch ply, the set up is kind of a PITA and it's not obvious, given the face width, how much compenstation you have to make to get the joined drawer width to fit the space available snuggly. My drawer widths ended up a quarter inch narrower than they should have been. Worse yet, I couldn't even use any of the parts when I tried another common kitchen drawer joint.
Fortunately, I also had a Baby Lock Miter bit - the one that'll do 3/8 - 3/4 inch thick stock - 1/2 inch ply being right in the middle. There's also one for 5/8 - 1 1/8 thick stock.
The beauty of this joint is that when you cut the drawer parts to fit the opening their outside dimensions don't change when you route the joints. You should have a zero clearance fence since the Baby Miter Lock is 2 inches in diameter. A jig to hold the stock in the two orientations is also a good idea
Wood Shop Demos (www.woodshopdemos.com/cmt-lm5.htm) has a slick method for setting up this bit for the thickness of the stock your using. Worth checking out. And you might want to check out Jesseda's page on thelock miter bit (http://www.jesada.com/instructions/lock_miter.html) as well.