Raised Panel, Rail and Stile, Doors
If you've got a router table with a decent fence, a matched set of Raised Panel Door router bits will eventually join your bits collection. And the first time you use them you'll discover that, despite what the guy doing the demonstration you saw at a store, woodworking show or on YouTube made you think, they're not quite as easy to set up correctly. Slight misalignments can mean hours of sanding (or 10 minutes of careful hand planing) - and your door may end up wider / narrower and/or taller / shorter than you intended.
It's understandable that your first experience with using a Raised Panel Door Set may be a bit "challenging" - you're playing with bits that are the "negative" of the parts they make, two have bearings on the top and one has a bearing sort of in the middle - and they're not labeled "Rail Bit", "Stile Bit" - the Raised Panel Bit doesn't need labeling - it's the Phreakin' BIG One. The fact that they don't come with any instructions doesn't make things any easier. And even if you're first use of these bits just happens to go perfectly - don't count on that happening - the next time you break them out to make some raised panel doors - a month or two, or a year later.
Since I bounce around in woodworking, trying new stuff on every project, it may be a while before I get to repeating something. Every new technique or method has its own learning curve to climb - and I DON'T LIKE CLIMBING. So as I try new things - I research them FIRST - then take notes as I go, filliing in important details as they come up. When I've got a set of instructions that work - for me - I put them up on this web site. That way I don't lose them - and maybe they'll be of use to some other woodworker.
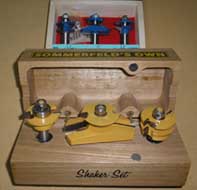
What follows is a step by step set of instructions, gleaned from The Wood Whisperer, Mark Sommerfeld and other demonstrators at woodworkiing shows, various magazine articles - and some personal experience. Each of the following pages is a GIF image file you can download to your computer, print out and add to a binder of How To. If you have any questions or have CONSTRUCTIVE criticism on how to improve these instructions - PLEASE - e-mail me
1. The cabinet's done - what should the dimensions be for the doors? (you already have the hinges you'll be using - right?)
2. Which one's the RAIL, which one's the STILE, which bit does what & how long (and wide) should my parts be?
3. I'm ready to start routing the parts. Where do I start - and why?
4. Setting up the RAIL BIT - getting the BIT HEIGHT and FENCE set correctly - and why.
5. Setting up the STILE BIT - the Stiles are too High / Low - now what?
6. The Rail and Stile frame is perfect - BUT - the RAISED PANEL BIT scares the hell out of me!
7. One page Crib Sheet for Rail, Stile and Raised Panel Bit Set
8. One page Crib Sheet for figuring out Rail and Stile Lengths and Panel Width
9. A DIY Incremental Zero Clearance Fence For BIG Bits like The Panel Raising Bit
The Wood Whisperer's YouTube Videos - look for Episode 29: Raising Arizona