Now on to the drawer unit. The drawer unit will be constructed between the front and back stretchers
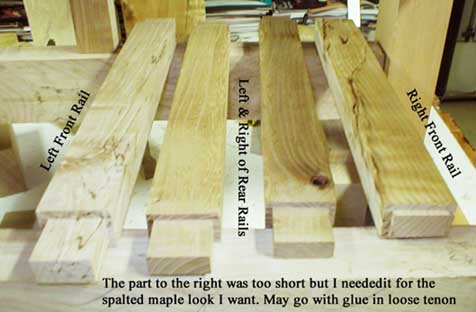
Note that all the "stiles" are 2 inches wide. That width allows for the double set of notches for the drawer guides on the center,"stile" and some knuckle clearance room between the outside drawer sides and the legs of the bench. The bench stretchers are spalted maple and I had some off cuts when I ripped the stretchers out of a 10" wide plank There was enough for four of the six stiles I needed. UNFORTUNATELY, one of the key pieces was too short for doing proper tenons which should be fairly long to allow for pegging later.
Had some elm stock thick enough for the rear outside rails. Intentionally kept the knot in the right one - it's a through knot. I'll tell people that the drawer unit is fit so well that the knot hole was necessary to let air in and out when a drawer is opened or closed. It'll be at the top of the drawer unit and, because the rails are set back from the front of the stretchers, won't be noticed unless pointed out.
Notice that the ends of the tenons are not chamfered - something I normally do. Sure wish I'd chamfered them.
Here's why.
I was going for a "spit tight fit" (fits snug but can be removed with little effort when dry, but if you spit on the wood and fit the pieces together the wood will swell enough to make taking the joint apart difficult - term and its definition provided by a member of The Wreck), shaving a little off the back and the non critical side of the tenon using a LN 60 1/2 rabbet block plane (really slick tool for tenon shaving), I'd gotten a tenon close - but just a little too tight. Being an impatient sort, I pushed the tenon into the mortise with more force than I should. The joint snapped shut and everything looked good.
But - when I tried to take the joint apart - nothing, nada, zip, no movement at all. Pulled a little harder and again - nada. OK - I'll clamp the mortised piece with my knees and use both hands to get this sucker out. Tug - nothing. Tug - nothing. Now I'm leaning over the tenoned part, jaw clenched, white knuckled. A deep breath and I give it a really good tug, putting my whole body into it.
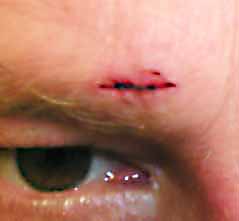
WHAM! The tenoned piece pops loose and the unchamfered corner of the upper tenon hits me forecefully just above and to the right of the bridge of my nose, right at the inside of the eyebrow. ( For the safety conscious reader - my glasses are safety glass - good thing too.)
I've had enough stitches in my life, most in the head which explains a lot, to recognize when I've incurred a deep cut rather than a mere scratch or scrape. I also knew that bleeding wouldn't start right away. So a quick - very quick - trip to the bathroom for a compress bandage (OK, it was actually Kleenex ) and a look at the damage. The purple around the quarter inch cut indicated a probable black eye the next day.
( ATTACKED BY A TENON )
When I got the bleeding stopped I went back and finished fitting all the remaining tenons to their mortises. Shave, test the fit, shave some more. Hadn't really been aware of how many woodworking operations involve leaning over the work, not good when you've got a fresh cut on your face - causes blood to flow. BTW - blood is really hard to get out of wood - works just like a penetrating stain (don't ask me how I know this aka DAMHIKT!). I also hadn't been really aware of how many woodworking operations require BOTH hands. Woodworking while you try to hold a compress over a cut is very difficult.
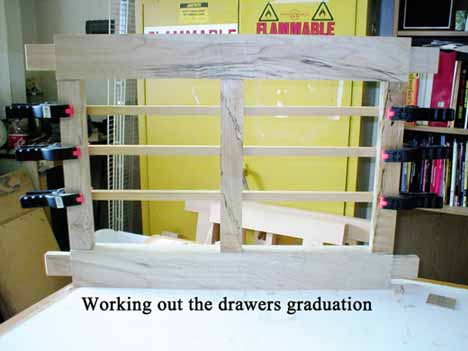
The next day - semi-black eyed, it was time to start working on the graduated drawer openings. The drawer dividers will be 3/4" so I ripped some doug fir to that size and started clamping them to the drawer unit frame so I could see what things will look like. Some people can do graduated drawers using a formula or doing scaled drawings. I'm not one of those people. I need to see things full size on the work. That's one of the nice things about mortise and tenon joints. You can put what you've completed together and work off the real thing. Then you can take everything apart after marking the parts for the next step and do the next parts.
I know, the top drawers look really small. But there's a method to the madness. The top drawers will be only 2 to 2 1/4" tall, inside space being 1 1/2 to 1 3/4 inches deep. These top drawers will be for small stuff that is used often but gets lost in the clutter - on the bench or the shelf under the bench. You know - marking knives, pencils, pencil sharpener, small Try Square, a small paring chisel or two. This wasn't my bright idea - so credit it to Michael Baglio of rec.woodworking who provided the idea.. Thanks again Michael!