Here are three shots of the table with all the parts dry fitted. One of the "stretchers" hasn't been shaped yet to show how much wood had to be removed to "blend" it to the leg. Probably half of the wood I started with is either in the dust collector or still on the floor of the shop. A spoke shave and block plane can generate a huge volume of shavings and curlies. Micro Planes "files" on the other hand make a lot of curlyettes.
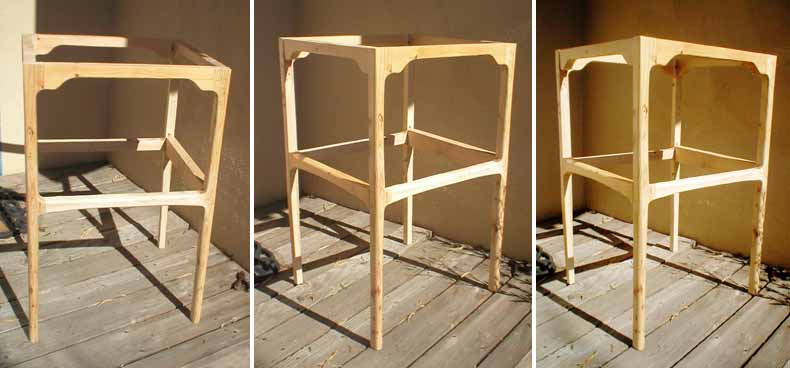
Yes, the bottom of the stretchers/shelf are curved. Yes, the legs do taper from the bottom of the stretchers/shelf, and yes, the front left leg does, in fact, curves. So much for starting with "kiln dried" 2x4s, milling the parts and putting them together right away. Some of the edges still need rounding, shaping and smoothing but so far so good. I now wish I'd allowed for a nicely shaped foot but maybe I'll do that if I ever make somethng like this in "real wood".
At this point it became obvious that a shelf inside the stretchers would be handy. BUT how to cut the dadoes for it AFTER doing the shaping?. With no straight edges to work off of I had to use the top of the table frame as THE reference, cut spacers to go from it to the top of the desired dado, mark the parts with a knife and then figure out how to route the dado on the parts, without the plunge router rocking all over hell. As luck would have it, I'd made a spare of each of the two stretchers.
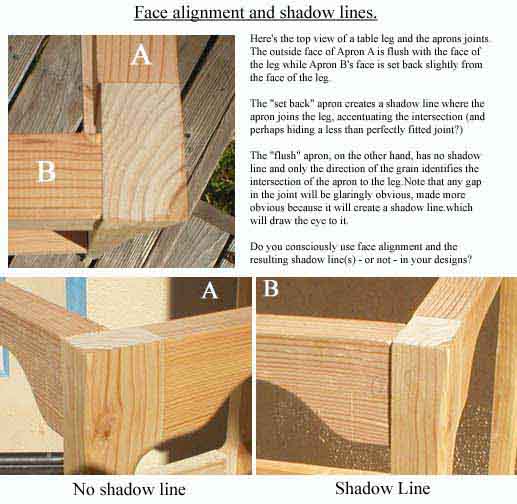
While taking these pictures - in direct sunlight rather than in the shop - I noticed the shadow line created by one of the apron set backs relative to the face of the leg. For this piece, the two planes - apron and leg faces - will be planed and sanded flush like the front joint. But it got me thinking about shadow lines as design elements. When you want to draw attention, a shadow line maybe just what you're looking for.